Engravers Needed

SCHOOLS

EQUIPMENT

 FORUM


Menu

Introduction
Schools
Online Videos
Online Books
Equipment
Tool Evolution
Impact speed
Tool Article
Lindsay Point
Tool settings
Starting a cut
FAQ
AirGraver Care
Practice plates
Tutorial 1
Tutorial 2
Tutorial 3
Carl Bleile Tutorials
Miscellaneous
Drawing
Transferring
Copyright free
Bulino
Bright Cut
Background
PalmControl CO2
Gold Inlay
Gold Wire Making
Burnishes
Undercurrents
Torch & Tank Setup
Beading Tools
Polishing Gravers
EngravingArts


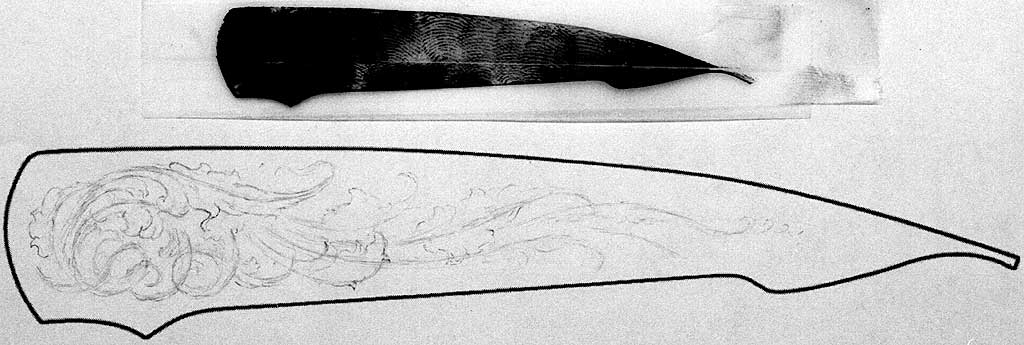
This drawing is ready to be printed with a laser printer and transferred.  Geel free to transfer and practice cutting it.  I saved it so that I believe the print size should come out right.  If you print it from your browser I don't think it will print the correct size though.   If you have Photoshop or a similar type of paint program open and print it 
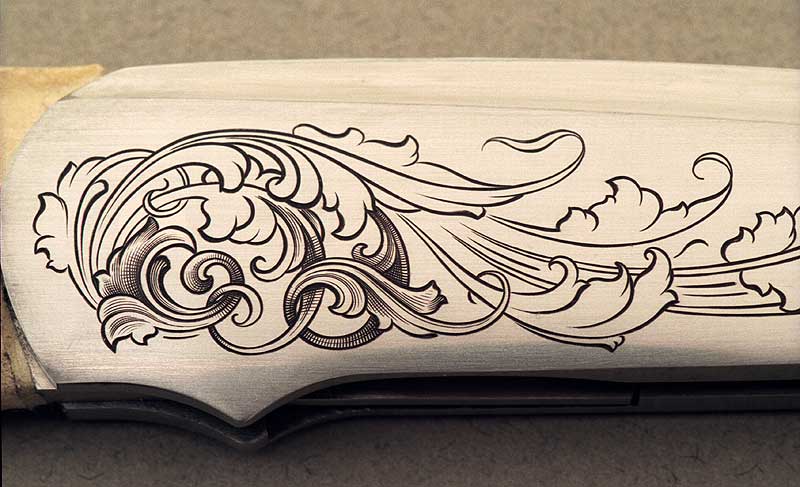
from there.  If you want to engrave it at the size it was originally cut the overall jpeg image should print out to be 3.35"x 0.646". (which comes out in the pixel resolution of 610 pixels per inch)  So if you open it in a program that lets you readjust the print size you can use this for reference.  If you are just learning to engrave you might print it out approximately twice this size, as it will be a little easier to cut larger.


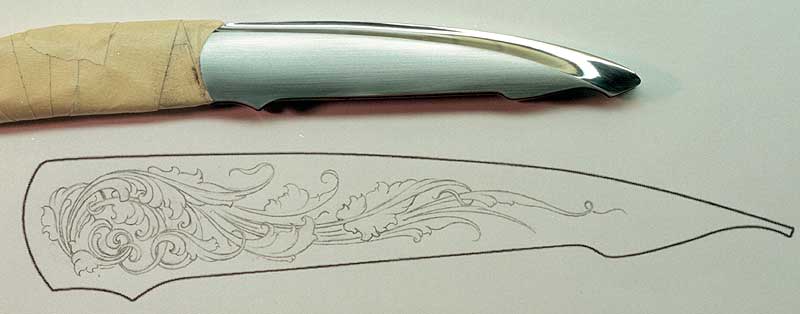
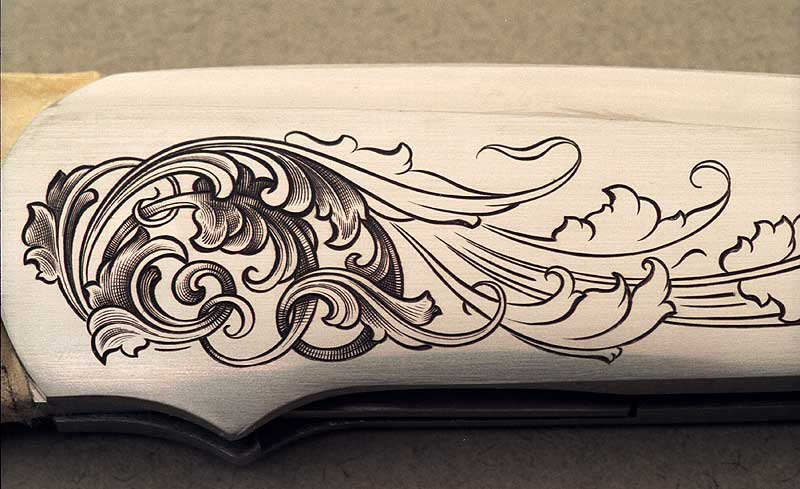
Above is the drawing ready for transfer.  Click on it to view.  Once it is full sized on your screen right click on the image and from the pop-up window choose "save picture as".
Please use this drawing for your private learning only and please do not email it around the web.

Click on images for larger pics

1: First very rough sketch. Ink print from knife is shown above that was used to find the shape of the knife.  The ink print was laid on the scanner and scanned into Photoshop.  In Photoshop an outline was drawn around the shape.  It was enlarged and printed out.  The design was then sketched and slowly refined with pencil. 

2: finished sketch ready for scanning into the computer reduced, printed and transferred.

3: outlines have been transferred and cut

4: shading process begins

5: more shading

6: and more

7: shading about finished

8: engraving is completed

Note about this knife:  Tim Herman is the maker.  Knife was made and engraved for the Darom knife book.  The engraving design was used and colorized for logo headers on this site. 
 

About.Contact

-- Sister Sites --

www.EngravingVise.com
www.AirGraver.com
www.ArtGraver.com
www.AngledGraver.com
www.EngravingClasses.com
www.EngravingLessons.com
www.EngravingSchool.com
www.EngravingForum.com
www.EngravingGlossary.com
www.SteveLindsay.com