Bulino dots is the easiest type of engraving to do, although it is a slow process. For bulino
"dot" engravings, I use several different points. A “V” graver without a
heel, a pin vise holding a needle-type point made of carbide, and the AirGaver handpiece with the same point. It is similar process as
using dots for scrimshaw, or using an ink pen and making dots on paper.
Basically, use whatever works to make the dots in the metal, placing them
where needed to give the effect you're after.
The dots
can either be inked like scrimshaw, or left bright. If leaving them
bright, make the point with three facets instead of using a round
needle-type point. First grind the punch round, and then place three
facets on the tip. This will make a point similar to the V graver without
a heel. The absence of a heel will let the point dig in and create a dot
rather than a line. The technique is to poke the point in and then pop it
out, which will remove the burr. Some engravers like to leave the burr. If
this is desired, simply eliminate the popping step. Dots made with facets
will catch light and help prevent it from reflecting back to the viewer,
so that at certain angles the dots will appear darkened, even though there
is no black in them.
For the
best contrast, it is hard to beat black ink. I use
oil base printers ink from Graphic Chemical. This ink is the
consistency of toothpaste, which helps it stay in the cuts until it is
dry. Smear the ink in the dots with your finger, and then wipe the top
surface off so that the ink is just in the dots.
It takes
little, if any, equipment to give the technique a try and practice.
White plastic spoons work well as a practice material. Place a needle in a
pin vise, or make a handle by sticking the back of the needle in a wood
dowel. Poke dots and/or small scratches in the plastic, and rub black ink
into the dots so they will show up. Scrimshaw is done the same way.
Colored scrimshaw differs only in that colored inks are used.
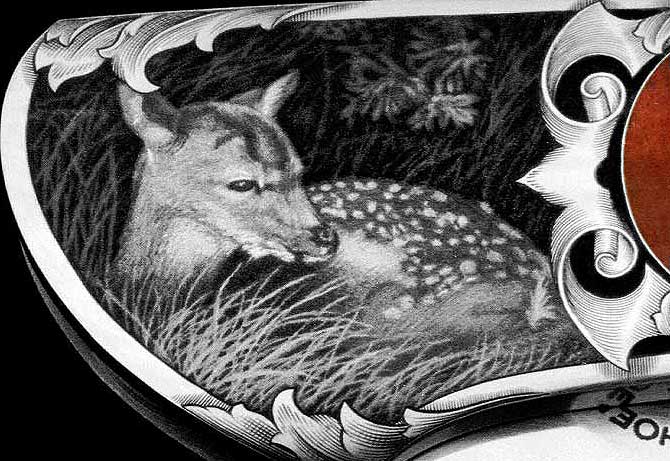
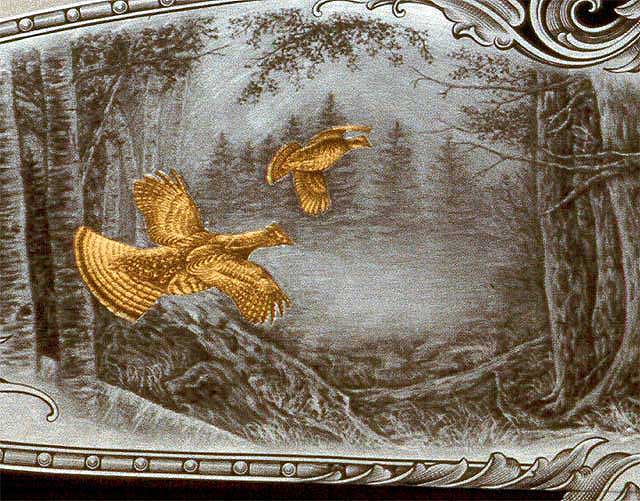
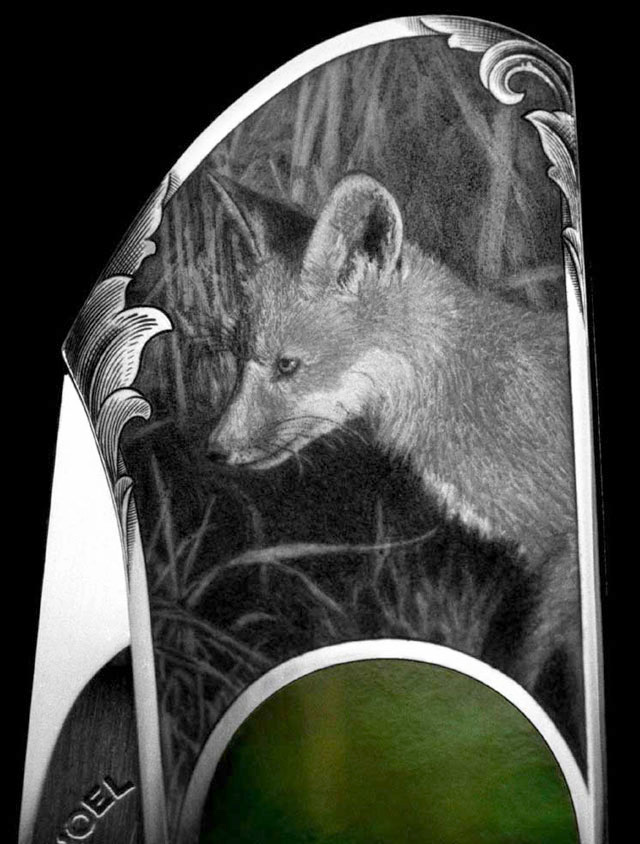
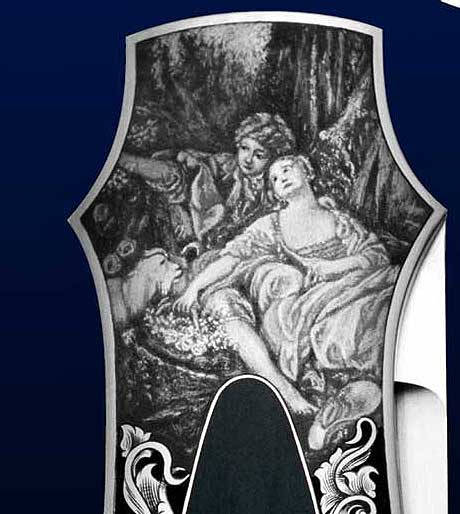
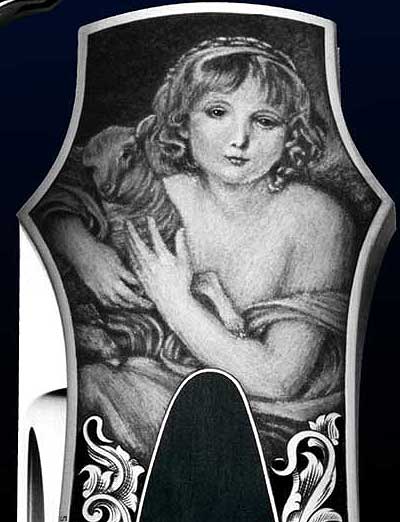
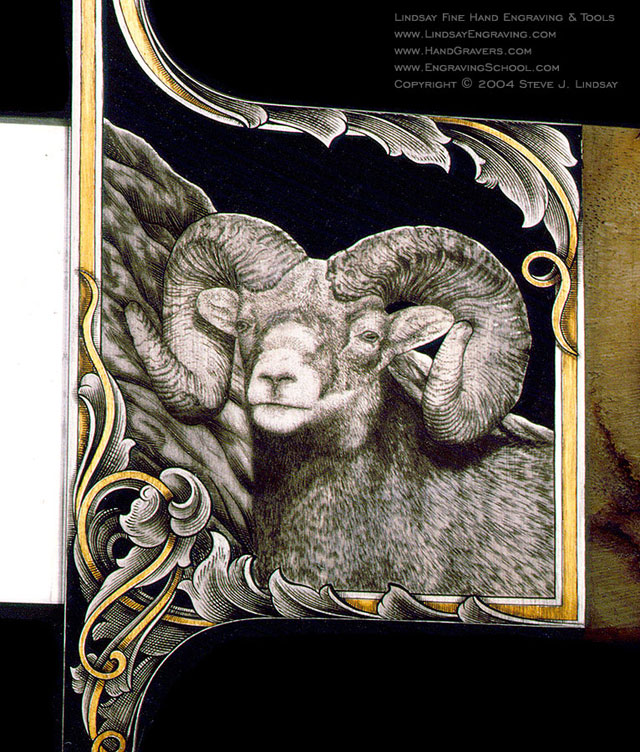
Here are some examples of dot engraving.
.png)